


Can Decorative Panels Be Cut to Non-Standard Dimensions?
A narrow return wall beside a doorway, a deep window reveal, or a ceiling feature that ends a few millimeters short of the opposite wall can turn a straightforward panel installation into a visible finishing problem. Decorative panels are often supplied in standard board sizes, but completed spaces rarely match those sizes exactly. Yes, decorative panels can usually be cut to non-standard dimensions, provided that the panel material, face finish, backing, edge treatment, and installation method are considered before cutting begins.
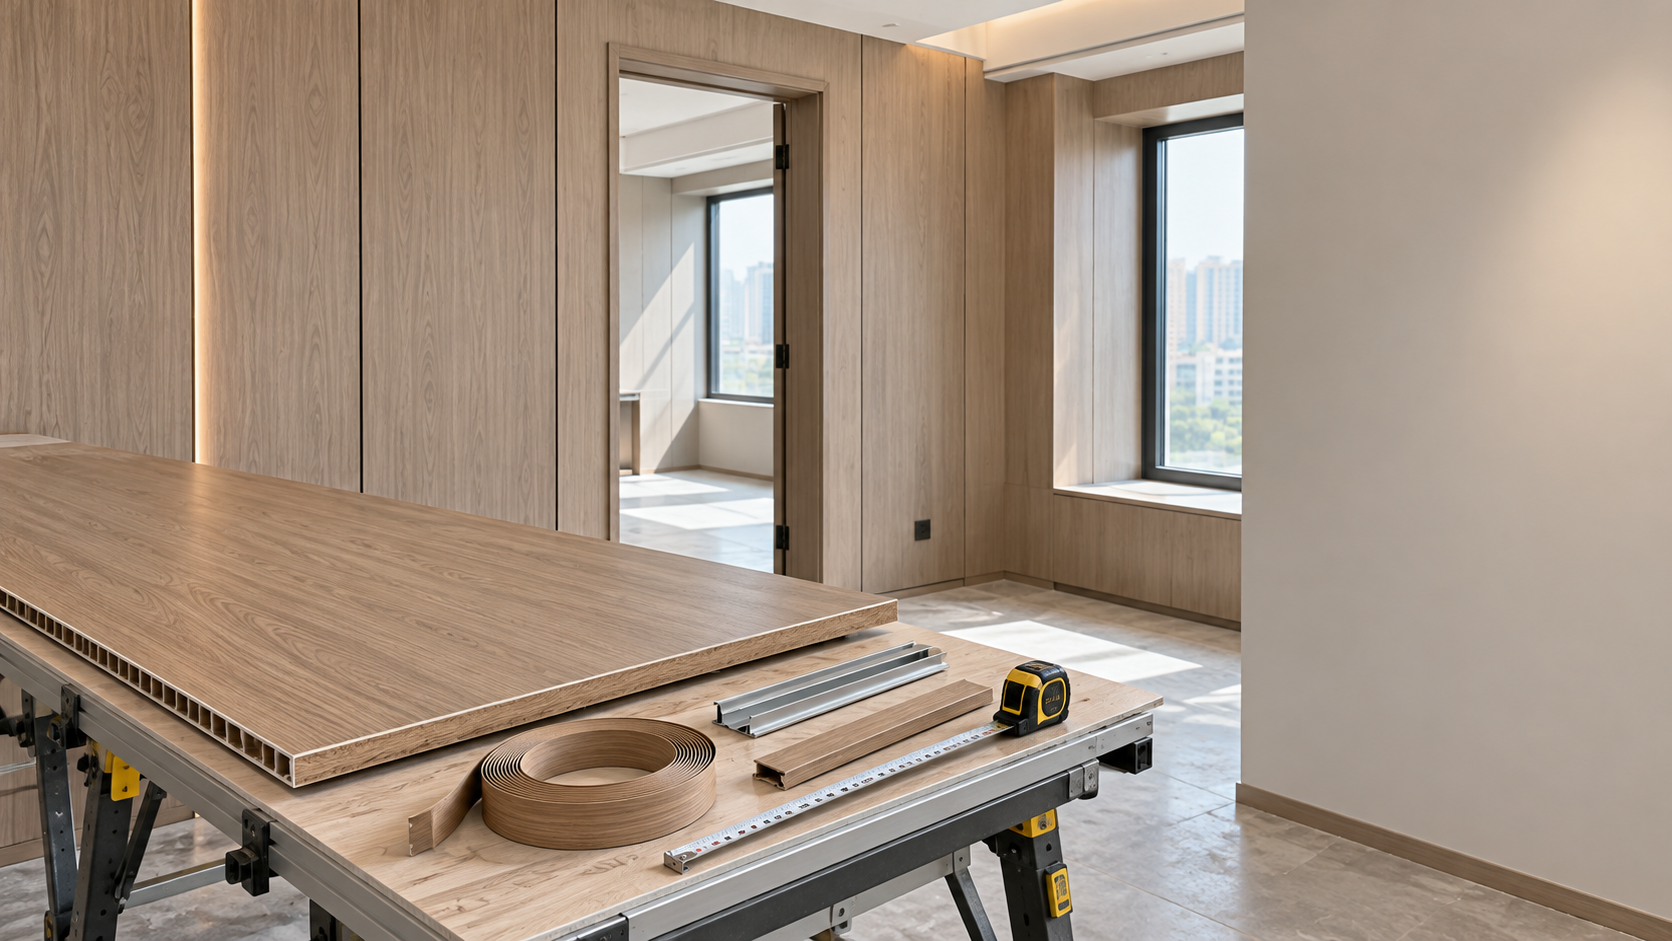
Cutting a panel to fit is not simply a matter of reducing its width or length. A clean result depends on accurate site measurement, suitable tooling, allowance for movement and trims, and an understanding of what happens to exposed edges after machining. Cut to size decorative panels can make curved transitions, shallow niches, irregular columns, service openings, and custom furniture faces look intentional rather than improvised, but the process must be planned around the properties of the selected panel.
When non-standard sizing is the right approach
Custom cutting is appropriate whenever the finished surface must follow an existing architectural condition rather than a standard module. This includes walls that are not perfectly square, columns with varying dimensions, built-in cabinets, reception fronts, ceiling islands, lift surrounds, and panels installed around pipes, sockets, switches, vents, or access hatches.
It is also useful where a design depends on a continuous visual rhythm. For example, a feature wall may require equal margins on both sides of a central opening. Using full panels on one side and a narrow, unplanned offcut on the other can make the layout appear unbalanced. By cutting the outer pieces deliberately, the installer can preserve the intended pattern and avoid a noticeably undersized final strip.
However, not every irregular area should be solved by forcing one panel into the opening. A very long wall with changes in level, a damp substrate, or a condition likely to move over time may need joints, trims, or a different fixing arrangement. The goal is not to eliminate every joint; it is to place joints where they are durable and visually controlled.
The first question is not “Can it be cut?” but “What is it made of?”
Decorative panels may have a wood-based core, mineral-based board, metal sheet, polymer substrate, composite construction, veneer face, laminate surface, coated finish, or acoustic layer. Each type responds differently to sawing, routing, drilling, and edge finishing. The same nominal dimension can therefore require very different machining methods.
Material information should be checked before dimensions are finalized. Some panels are designed to be field-cut; others are best fabricated in a controlled workshop because their surface finish or core demands more precise equipment. Where fire performance, moisture resistance, acoustic behavior, or another specified property is important, cutting and edge treatment should follow the applicable product instructions. An unsealed exposed core or an unsuitable edge detail may affect how the panel performs in service.
Measure the installed condition, not the drawing alone
Architectural drawings are essential for layout, but site dimensions determine final cutting sizes. Walls can be out of plumb, floors can rise slightly across a room, and steel, plaster, tile, or trim thicknesses can differ from the original details. A panel cut only to the nominal drawing size may fit at one end and bind at the other.
For a rectangular opening, measure the width at the top, middle, and bottom. Measure the height on both sides and at the center where practical. Record diagonal dimensions as well; unequal diagonals indicate that an opening is not square. For a panel wrapping a column, measure each face individually instead of assuming opposing faces are equal.
Irregular walls require a template or scribing method. A simple cardboard or thin-sheet template can help transfer profiles around masonry projections, uneven plaster, curved reveals, and pipe penetrations. For more complex geometries, digital measurement or shop-made templates may reduce the risk of wasting finished material. The panel should be marked from a confirmed reference edge, not from an assumed straight wall line.
Allow for clearance and movement
A panel should not be cut so tightly that it must be forced into place. Small clearances are usually needed at surrounding walls, floors, ceilings, and adjacent panels. The exact allowance depends on panel type, panel size, environmental conditions, fixing system, and whether a trim or shadow gap will cover the edge.
Wood-based and some composite materials can respond to humidity and temperature changes. A rigid installation between immovable surfaces may lead to bowing, edge pressure, or open joints elsewhere. Panels installed over a subframe also need enough tolerance to be positioned accurately while keeping their decorative faces aligned. Any movement gaps should be concealed by a suitable detail rather than filled randomly after installation.
Set out the full composition before cutting individual pieces
A frequent mistake is to start with the first full panel at one edge and leave the final panel until last. This can create a narrow strip that is difficult to fix, visually awkward, or unable to support the intended pattern. It may also leave insufficient material around a cutout for a switch, vent, or access opening.
Instead, lay out the entire elevation first. Identify the visual centerline, starting point, panel joint locations, grain direction, repeating textures, and positions of trims. When panels have directional veining, linear grooves, perforations, geometric patterns, or metallic effects, orientation matters as much as size. A piece can fit physically but still look wrong if its face pattern runs against adjacent panels.
- Mark the finished boundaries, not just the substrate dimensions.
- Decide whether edge trims, shadow gaps, or butt joints are part of the finished design.
- Balance border widths where the layout is intended to look symmetrical.
- Keep narrow cuts away from highly visible locations when a wider, balanced arrangement is possible.
- Check that fixings, adhesive zones, and backing supports remain adequate after trimming.
- Confirm which edges will be exposed once the panels are in place.
When a decorative face includes a repeating pattern, calculate the pattern position before cutting. Cutting equal physical widths does not always create equal visual widths. A groove line, printed motif, or perforation row near one edge may make adjacent panels appear misaligned unless the pattern is set out deliberately.
Choose the cutting method around finish quality
The correct tool is determined by panel construction and the quality required at the visible edge. A fine-tooth blade with the proper geometry can reduce chipping on faced boards. A track saw or panel saw supports long, straight cuts more reliably than a handheld saw without guidance. Routing can be useful for shaped profiles and precise openings, while holes for pipes or circular fittings may require a suitable hole saw, cutter, or CNC process.
Good support matters. The panel should be fully supported during cutting so that it does not vibrate, flex, or break away at the end of the cut. The finished face should be protected from abrasive work surfaces and metal swarf. Where a protective film is supplied, it is normally left in place during fabrication unless the material instructions state otherwise.
Test cuts are sensible when the panel finish is unfamiliar, especially where a chipped edge will remain visible. A small offcut can reveal whether the blade leaves a clean face, whether the cut direction should change, and whether edge banding or a trim is necessary. This is far less costly than discovering the problem after a full-size feature panel has been machined.
Openings need more planning than straight cuts
Socket boxes, data outlets, vents, access panels, pipes, and lighting components introduce stress points and visual interruptions. Their locations should be transferred from site measurement rather than estimated from adjacent panel edges. Before cutting, verify that the opening will not land on a joint, remove too much support from a narrow panel, or interrupt a feature pattern in an avoidable location.
Internal corners in rectangular openings should not always be made as sharp cuts, particularly in materials prone to cracking. Depending on the panel type and fabrication guidance, rounded internal corners or properly relieved corners may reduce stress concentration. Openings also need sufficient clearance for fitting components and any planned cover plate.
Do not overlook cut-edge treatment
The exposed edge is often where a custom-sized panel succeeds or fails visually. A factory edge may have a different finish from a fresh cut. It may be sealed, painted, laminated, veneered, edged, folded, or designed to sit behind a trim. Once cut, the new edge may reveal a contrasting core, absorb moisture, collect dirt, or appear rough under direct lighting.
Several edge solutions are possible, but they are not interchangeable:
- Edge banding can cover exposed edges on suitable board-based panels and can be selected to match or complement the face.
- Matching paint or sealant may suit concealed or low-visibility edges, provided it is compatible with the core and intended environment.
- Metal, PVC, or decorative trim can protect an edge while creating a defined border or joint line.
- Shadow gaps intentionally reveal a recess, avoiding the need to disguise every cut edge while allowing installation tolerance.
- Returned or folded edges may be used in some panel systems where the material and fabrication method allow it.
Edges near floors, wet cleaning zones, exterior transitions, or areas exposed to repeated contact deserve extra attention. A cut edge hidden behind a base trim may still need sealing if the core is moisture-sensitive. Conversely, adding a thick edge treatment where the panel is meant to sit flush can interfere with the installation detail.
Installation can change the final dimension requirement
A panel is not truly “finished size” until the fixing method has been considered. Adhesive-mounted panels need a substrate that is sufficiently flat and stable; an uneven wall may require packing, levelling, or a subframe. Mechanical fasteners can require margin distances from panel edges. Clip systems often need a defined rear profile or perimeter clearance. A panel cut to the exact visible opening may become unusable if the back-side fixing zone has been removed.
Dry fitting before final bonding or fixing is especially valuable with non-standard dimensions. Place the panel in position, check clearances, inspect pattern continuity, and confirm that doors, drawers, access panels, or adjacent finishes still operate correctly. Only then should permanent adhesive, sealant, or mechanical retention be completed.
For panels meeting other materials, decide which surface has priority. A panel that terminates against tile, glass, cabinetry, plaster, or a metal frame may need a different gap and edge profile. The cleanest junction is usually planned before cutting, rather than corrected later with a wide bead of sealant.
Situations that need an extra level of caution
Curved walls, fire-rated assemblies, large-format panels, high-impact zones, wet areas, and installations above head height deserve more than ordinary site trimming. Curved surfaces may require a panel specifically designed to bend or a segmented layout; cutting a rigid flat panel into a curved shape does not make it conform safely. Large panels can be difficult to handle and may need planned lifting, support, and joint locations. Panels forming part of a tested fire or acoustic assembly should not have their backing, seals, or fixing method altered without confirming the system requirements.
Likewise, a panel that appears dimensionally simple may hide services behind it. Before drilling or cutting into an installed wall, identify electrical, plumbing, mechanical, and structural elements. Decorative finishing work should not compromise concealed building components.
Questions that often arise during custom panel planning
Can decorative panels be cut on site?
Many can, but site cutting is best limited to materials and details that tolerate it. Long visible cuts, premium veneer faces, intricate patterns, and panels requiring precisely finished edges are often better prepared in a workshop. Site conditions such as dust, limited support space, poor lighting, and difficult handling can reduce cut quality.
Should panels be ordered to exact final dimensions?
That depends on the supplier’s fabrication capability and the reliability of final site measurements. Ordering fabricated sizes can save installation time, but only after the finished openings, trims, and fixing details are confirmed. Where construction dimensions are still changing, retaining a controlled trimming allowance may be safer.
Can a cut edge be left unfinished?
It can be left unfinished only when it will be fully concealed and the panel core does not require protection. Visible, moisture-prone, or frequently touched edges usually need a planned finish. The appropriate treatment depends on the panel construction and the final environment.
Non-standard dimensions are not a limitation for decorative panels; they are a normal part of fitting finished materials into real spaces. The reliable path is to confirm the panel construction, measure the completed condition carefully, set out the full visual arrangement, allow for installation tolerances, and treat every visible cut edge as part of the design. When those decisions are made before the first cut, custom-sized panels can fit irregular spaces without sacrificing the appearance or intended performance of the surface.
RECOMMEND

Oct 10, 2026
Choosing Spa Wall Panels for Humid Rooms, Hygiene, and Easy Maintenance
Spa Wall Panels for humid rooms: compare moisture resistance, hygiene, chemical durability, fire compliance, and easy-maintenance system details for lasting spa interiors.
Oct 10, 2026
Jewelry Store Wall Panels That Enhance Lighting, Security, and Luxury Displays
Jewelry Store Wall Panels: discover how refined finishes improve lighting, security integration, durability, and luxury displays for a polished retail experience.
Oct 10, 2026
Can Decorative Panels Be Cut to Non-Standard Dimensions?
Cut to size decorative panels for non-standard dimensions—discover how precise measuring, clean cuts, and edge finishing deliver a flawless custom fit.
Oct 10, 2026
How to Select Decorative Wall Panels for Commercial Interiors
Decorative wall cladding panels commercial interior guide: compare durability, fire performance, moisture resistance, acoustics, and finishes for smarter project choices.